How to Repaint Kitchen Cabinets Like a Pro (Step-by-Step Guide)
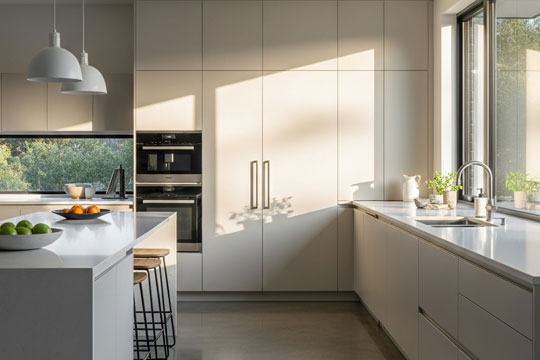
There’s a quiet transformation that happens when you refresh the heart of your home. It doesn’t require a full renovation—just something accessible, thoughtful, and surprisingly powerful. Your kitchen cabinets carry much of the room’s visual weight; a fresh coat of paint can brighten the entire space, bringing new energy and a renewed sense of style.
The process may seem intimidating, but learning how to repaint kitchen cabinets the right way is more about patience and preparation than innate skill. This step-by-step guide will help you achieve a smooth, professional-quality finish that truly lasts.

Is This Project Right for Your Cabinets?
Before you dive in, take a moment to assess what you’re working with. Repainting is ideal for cabinets that are structurally sound but cosmetically dated. Run your hand across the doors. Are they solid wood or high-quality plywood? If the frames feel sturdy and the surfaces are intact, paint can rejuvenate them beautifully.
If the cabinet boxes are warped, the laminate is peeling, or the doors are chipped particleboard, painting may only offer a temporary improvement. This project rewards effort and care, so it’s most satisfying when applied to a foundation built to last. Trust your instincts—if the structure feels solid, you’re ready to move forward.

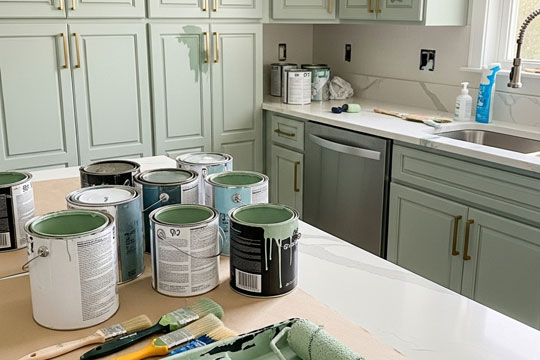
Step 1: Planning & Preparation – Your Blueprint for Success
Your success begins long before you open a can of paint. Think of this phase as laying the groundwork—the quiet but essential steps that ensure a smooth, beautiful outcome. Rushing through it leads to frustration; approaching it thoughtfully sets you up for a seamless project from beginning to end.
Start by gathering your tools. Having everything ready prevents interruptions later. You’ll need:
- Cleaning & Prep: A high-quality degreaser, lint-free cloths, wood filler, sandpaper (120 & 220 grit), a sanding block, and tack cloths.
- Protection & Disassembly: Painter’s tape, drop cloths, screwdrivers, a label maker or tape and pen, and resealable bags.
- The Paint System: This is non-negotiable. Invest in a stain-blocking primer designed for cabinets and durable, cabinet-grade paint. A satin or semi-gloss sheen is ideal for kitchens.
Also set aside enough time. This isn’t a one-afternoon refresh. Plan for a long weekend so each layer can dry properly without pressure.
Step 2: The All-Important First Step — Cleaning & Degreasing
Even if your cabinets look clean, kitchen surfaces accumulate years of oils, cooking residue, and airborne grime—much of it nearly invisible. Paint won’t adhere to this film, and skipping this step almost guarantees peeling.
This is a true deep clean, not a casual wipe-down. Wearing gloves, saturate a clean cloth with degreaser and scrub every surface—door fronts, backs, frames, sides, and the easily forgotten tops and bottoms. Pay extra attention to high-touch areas around handles and near the stove.
Rinse with a clean, damp cloth to remove any remaining residue, then let everything dry completely. You’re creating the perfect blank canvas, and careful cleaning is what ensures your finish stays flawless for years.
Step 3: The Disassembly & Labeling System
With your cabinets clean and dry, it’s time to take everything apart. This stage is essential if you want a flawless, professional finish because it allows you to coat every surface evenly.
Carefully remove all doors, drawers, and hardware. As you do, use a simple labeling method that keeps everything organized:
- Label Immediately. Place a small piece of painter’s tape on the back of each door and inside the matching frame. Mark them with the same code (for example, “U1” for upper cabinet #1).
- Bag Hardware. Put all screws, hinges, and pulls for each cabinet into separate, clearly labeled plastic bags.
This small but meticulous step prevents the stressful guessing game during reassembly. Once everything is removed, set up a dedicated painting area—whether it’s a garage, basement, or spare room—and lay the doors flat on sawhorses.

Step 4: Repairing and Sanding — Creating the Perfect Surface
This is where your finish goes from “DIY project” to “factory smooth.” You’re not simply scuffing the surface—you’re creating the ideal texture, or “profile,” for the primer to grip.
Start with repairs. Fill any dents, scratches, or old hardware holes with wood filler. Let it fully dry, then sand it smooth so it blends seamlessly with the surrounding surface.
Next, sand everything. For cabinet frames, sand by hand. For removed doors, use an orbital sander on flat centers and finish the edges by hand. Your goal is to dull the entire existing finish uniformly—no shiny patches should remain. Always sand with the grain to avoid swirl marks or scratches.
Then comes the crucial clean-up. After sanding, a fine dust will coat every surface. Wipe everything down with a tack cloth, followed by a barely damp cloth. The surface should feel smooth and velvety. Any leftover dust will get sealed into your paint and create a gritty texture.
Step 5: The Primer Coat — Your Unseen Anchor
Primer is the quiet MVP of a high-quality paint job. It seals the wood, blocks potential stains, and creates the perfect foundation for true, long-lasting color.
Stir the primer thoroughly. Using a high-density foam roller for flat surfaces and a quality angled brush for edges, apply a thin, even coat to every part. Resist the urge to add more—thin and consistent is the rule here.
Once the primer dries completely (usually 2–4 hours), lightly sand all surfaces again using 220-grit sandpaper to remove any tiny bumps or imperfections. Wipe everything clean with a tack cloth. At this point, you’ve created the ideal canvas—smooth, sealed, and ready for paint.
Step 6: Painting Techniques for a Factory Finish
This is the moment your preparation pays off. Painting cabinets is all about technique—achieving a smooth, durable finish without brush marks, texture, or drips.
Make sure your workspace is well-ventilated and free of dust. Stir your cabinet paint gently (never shake it). Use a high-density foam roller for flat door surfaces and a high-quality angled synthetic brush for corners, edges, and detail work.
Use this simple two-part method:
- Lay on the paint: Apply a thin, even, controllable layer.
- Tip off: Immediately afterward, use your nearly dry brush to glide lightly over the wet paint in long, steady strokes with the grain. This step “tips off” the finish, smoothing out any marks before they set.
The golden rule remains: multiple thin coats beat one thick coat every time. Allow each coat to dry fully (4–6 hours), then lightly sand with fine-grit sandpaper to remove tiny bumps before wiping clean. Patience between coats is the true sign of a pro finish.

Step 7: Reassembly & The Final Reveal
Once your final coat has dried for at least 24 hours, the satisfying reassembly begins. Your labeling system now makes the process seamless instead of confusing.
Reattach hinges and hardware to each door using your labeled bags. Then match the numbered doors to their corresponding frames and hang them in place.
Most doors need a bit of fine-tuning after painting—this is normal. Most modern hinges allow for small micro-adjustments, so take a moment to align each door until everything hangs straight and even. This last detail delivers that crisp, built-in, professionally finished look.
Step 8: Caring for Your Newly Painted Cabinets
Remember, paint continues to cure and harden over time. Give your cabinets a gentle 2–3 week curing period. During this time, close doors softly and avoid putting weight on handles.
For everyday cleaning, use only a soft damp cloth paired with a mild, non-abrasive cleaner. This simple care routine will keep your smooth, fresh finish looking beautiful for years.
Beyond the Basics: Adding a Personal Signature
Once you’ve mastered the fundamentals, a few subtle touches can make your cabinets feel uniquely yours:
- Subtle Dimension: For added character, lightly distress the door edges with fine sandpaper to reveal a hint of primer or wood beneath.
- Updated Hardware: Think of knobs and pulls as cabinet jewelry. Swapping them for matte black, brushed nickel, or warm brass can completely transform the look.
- Interior Accents: Consider painting the inside of frames or shelves in a soft, contrasting neutral for a delightful surprise and added visual depth.
These details are your signature—proof that you didn’t just repaint; you reimagined your space.
Conclusion: You’ve Got This
Learning how to repaint kitchen cabinets is ultimately an exercise in trust—trust in the process, in high-quality materials, and in your own hands. It shows that a dramatic kitchen refresh doesn’t require a contractor, just patience and a clear plan.
You didn’t just change a color—you renewed the heart of your home with intention. So take a moment to admire those beautifully aligned doors and enjoy the brightness of your refreshed space.
You’ve earned every bit of it.